Spring is in the air, bringing the feeling of new beginnings, rejuvenation, renewed energy and the strong desire to be outdoors. Part of the fun of being outside is being active with family and friends, such as going to parks, playing ball, swinging, sliding, and the greatest fun of all - flying kites!
Kites have been flown for over 1,000 years, and the joy of flying kites has increased. Experience that joy with a great family bonding day by creating, designing and making your own kite. Once the kite is made, delight in taking the kite to the air for its first soar off the ground.
Part of the family fun is making a kite from supplies you probably already have at home. One of the strongest materials is Tyvek® which is used for indestructible large envelopes. The strength and light weight of the material makes it ideal for making kites, and it’s a great way to recycle these envelopes. If you don’t have any Tyvek on hand, another good choice is a strong garbage bag; the puncture resistant type.
Supplies and directions to make your own kite:
- One puncture proof garbage bag
- Two wire hangers (the thinner wire hangers are easier to bend)
- Pliers (to bend the wire hangers)
- Duct or packing tape (Scotch™ tape, masking tape or painter's tape doesn’t work as well)
- String (string, twine, ribbon, etc.)
- Kite string for flying the kite
- Stickers (to decorate)
- Scissors
- Cut garbage bag open by cutting the bottom off and then cutting up one side of bag to make one big piece of plastic.

- Use pliers to open and straighten the wire hangers. The wire hanger does not have to be perfectly straight. Bend ends over, so it does not puncture plastic and to adjust the length of the wire.
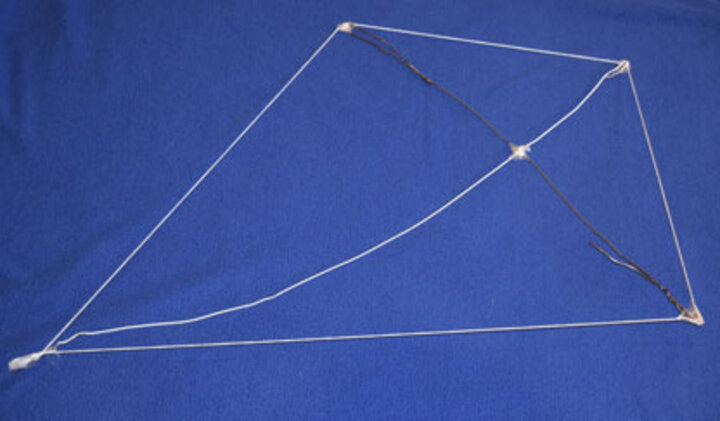
- Place the two wire hangers into a “t” shape and connect at the center crossing using string. After tying together, make sure it is tight and secure.
- Attach the string to the four ends of the cross, outlining a traditional kite shape.
- Lay the plastic flat and place the wire kit framing on top of the flat plastic bag. Cut the plastic about one inch bigger then the wire frame.
- Use the tape to attach the wire kite framing to the flat plastic bag, by pulling the plastic edges over the string and tape to the flat plastic.
- Flip the plastic covered frame over.
- Cut a piece of string about 20 inches long. Poke holes in the top and bottom of the kite and tie the string in a knot in the top and bottom holes (if necessary, use some tape to keep it secure). Then tie on the rest of your long string to the middle of the string.
- Finally, decorate and make a tail, which is important for balance. Onto another piece of string tie 1x8 inch pieces of plastic bag every 6 inches along the string (or use a ribbon).
*Reference to commercial products or trade names is made with the understanding that no discrimination is intended of those not mentioned and no endorsement by University of Nebraska–Lincoln Extension is implied for those mentioned.
This newsletter was originally written by Pat Jones. It has been peer-reviewed and updated in 2022.


